Friday, 31 July 2015

Time for Cricket?

Well the nice weather has come and gone so it must mean it is time for some relaxing test cricket to wind away the summer evenings. Well that should be the plan apart from England and Australia deciding to play 20/20 style cricket in their whites. So with this in mind and almost 3 days of play not happening I can show you our N Gauge Cricket pavilion in a bit more detail. local cricket- club kit

The first step was to find a pavilion that looked relatively generic and not too big. I eventually found a nice simple pavilion but didn't like the front of the building, so a bit more researching and ending up finding a bowls club pavilion that had a veranda that would look the part, so back off to the laptop and welded the two designs together.  While I liked how it looked it needed a few extras which meant designing the scoreboard, screens, stumps and bats, and this is what I got:


It was time to send it off to the laser and wait for that satisfying BEEP to tell you that it has finished working its magic.

Time to build:

The first step was to remove the pieces, I had designed it so there are tiny tags holding the pieces in place, simply nip these with a knife (tip: turn the fret over to do this as you can see where the tags are)
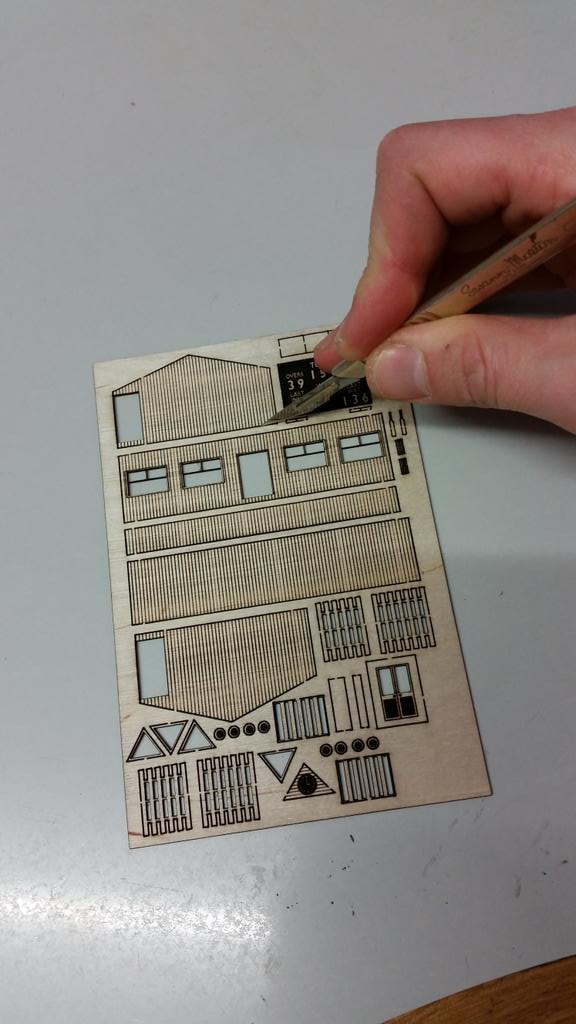


This is a pretty simple structure to put together, glue the 4 sides together to give you a basic box (we like to use the rite-way modelling tool to give you a square corner: http://www.osbornsmodels.com/faller-170681--rite-way-modelling-aid-29768-p.asp), because these are made of ply any wood glue should be fine, we personally use UHU Holzleim http://www.osbornsmodels.com/arch-laser-fast-setting-glue-35750-p.asp  it doesn't leave marks on the wood and dries nice and quick to let you get the build done a bit quicker. Add the veranda floor and you should be at this stage below:


The roof and veranda are made out of card, firstly most people will want the veranda to be white so no need to do anything with it, just glue in place and secondly the card allows greater detail of cut allowing us to create a finer veranda. The clock part is separate and doesn't need to added unless you want to.
The screens are easy to assemble and the scoreboard just needs the feet gluing on (the score can be customised to any score you like, just let us know when ordering). Now all you need to do is paint the roof, make the pitch and turn on test match special


Kit available at www.osbornsmodels.com


Tuesday, 7 July 2015

Time to fence it in

The laser is capable of cutting most materials but one of the best results we can get comes from cutting card. It will cut card to to almost any minute detail you need and without burning it. So with this in mind I have come up with some card based products that need the extra detail.

The first is some modern security fencing, pre-coloured in grey so no need for painting:

The 3 prongs on the top of each post are approx 0.5mm, here is a close up (excuse the poor picture)


Because it is made of card you can shape or put a 90 degree joint very easily. (see link below)
http://www.osbornsmodels.com/archn0022-arch-laser--palisade-security-fencing-35110-p.asp
These are used up and the country, in railway yards, industrial estates, schools etc etc. Basically they are everywhere and can now be on your layout.


We have also come up with some Iron railings. Again pre coloured for ease: These have not been put up for sale yet but will be the same price as the modern security fence above. These come with 2 straight sections and a gate section. Perfect for a school or factory scene. They have a spear top and very fine rails (approx 0.3mm width)


Let me know what you think and if there are any other types or styles we should be producing

http://www.osbornsmodels.com/arch-laser-co-1024-c.asp

Friday, 26 June 2015

Tetbury Goods Shed

This was one of the first kits I started working on when we first got our Laser but it got put on the back burner while other kits took up my time.

Anyway here are a few construction images of the test build of this kit:


 the main building is 1mm ply while the roof is made of card. The reason for card is that it will still engrave to a good depth but will allow quick and neat construction. The chimneys were a little bit more challenging than I first thought, to get them to sit in the roof structure took a few trial runs but it worked out in the end.

Here is a picture of the kit (unpainted and no barge boards) super imposed onto a real Tetbury picture:


 Hopefully this kit has captured the look of Tetbury in N Gauge, would love to hear peoples comments (good or bad)

I will do a separate post about the painting of the kit soon

Available now:
http://www.osbornsmodels.com/archn0023-arch-laser--large-goods-shed-based-on-tetbury-35772-p.asp


Time to Blog!

I thought it might be good to show in a blog our developments as they come about in the world of laser cut kits. Most of our kits are produced for the British N Gauge Market but you may spot a few other things along the way. I will try and keep you up to date as much as possible and try and show you what we can do on our laser cutter.

Hope you enjoy.

Mike